
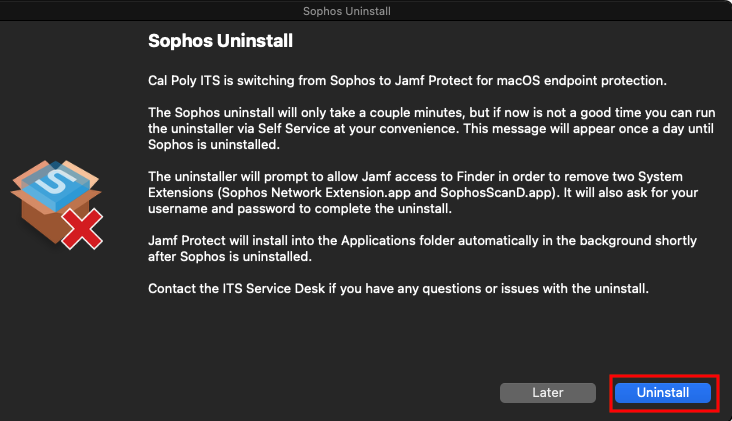
If you use a Cal Poly owned macOS computer, you may be prompted to uninstall Sophos Central Endpoint Protection antivirus software, or you can initiate the uninstall on your own. As part of this process, your computer will uninstall Sophos, then automatically install Jamf Protect. If you need help, contact the ITS Service Desk by submitting a support request or by calling (805) 756-7000.
Click the Uninstall button.
Click the OK button.

Click the Continue button. You may not be prompted to complete steps 3 - 7 if your computer is running an older operating system.

In the User Name field, enter your first and last name, then enter your Cal Poly password. Click the OK button.

Click the Continue button.

In the User Name field, enter your first and last name, then enter your Cal Poly password. Click the OK button.

Your computer will uninstall Sophos, then automatically install Jamf Protect.
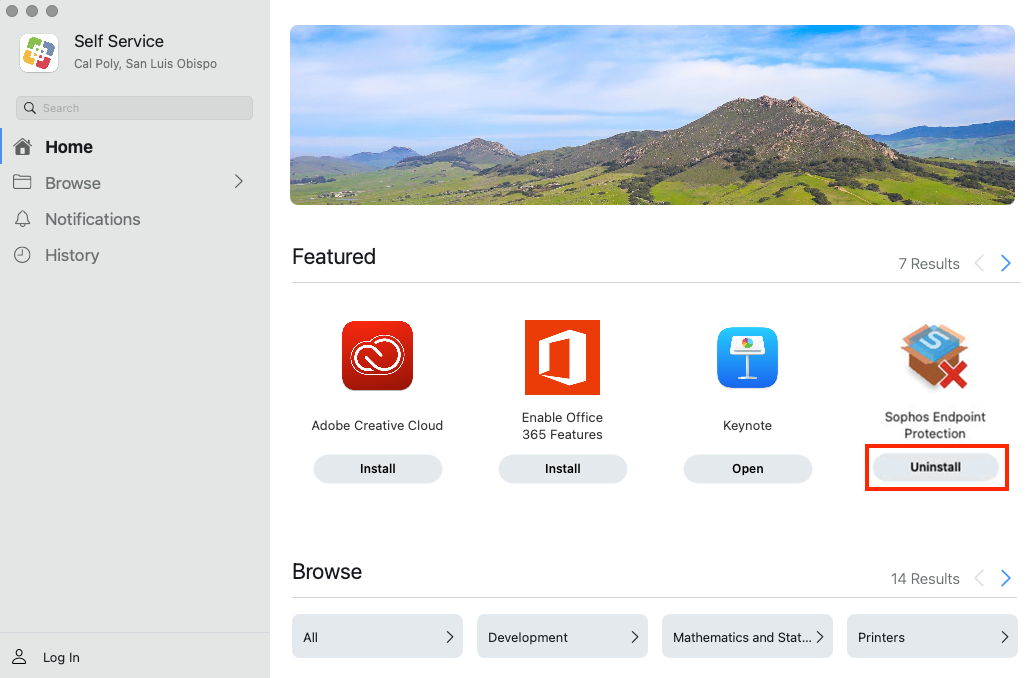
Click Command ⌘ + Space Bar. Enter "Self Service" and click the Enter button.
Find Sophos Endpoint Protection and click the Uninstall button. If you don’t see the Uninstall button, then Jamf Protect is already installed on your computer.
Click the OK button.

Click the Continue button. You may not be prompted to complete steps 4 - 8 if your computer is running an older operating system.

In the User Name field, enter your first and last name, then enter your Cal Poly password. Click the OK button.
Click the Continue button.
In the User Name field, enter your first and last name, then enter your Cal Poly password. Click the OK button.
Your computer will uninstall Sophos, then automatically install Jamf Protect.
If your computer hasn't been connected to the internet for an extended period of time, follow these steps before uninstalling Sophos.
Turn on or restart, then log in to your computer.
Connect to the internet using a network cable or WiFi.
This will prompt your computer to run any operating system and software updates. You can use your computer while the updates are running.
Updates may require multiple restarts and take a significant amount of time, depending on how long the machine has been off.
To connect to campus WiFi, visit Connect to eduroam WiFi. If you're having trouble connecting to WiFi, visit Can't Connect to eduroam WiFi.