ITS Home  |  Service Catalog  |  Knowledge Base  |  Support Center  |  Contact ITS Service Desk     

Skip to end of metadata
Go to start of metadata

You are viewing an old version of this page. View the current version.

Compare with Current View Page History

« Previous Version 21 Next »

To get connected to wired ethernet in the Frost Center, please follow the steps below, based on your particular computer’s operating system.

macOS

 click to view how to connect on macOS...
  1. Plug your ethernet cable into your computer.

  2. In the authentication window that pops up, enter your CP username and password.

  3. Click OK.

Windows

 click to view how to connect on Windows
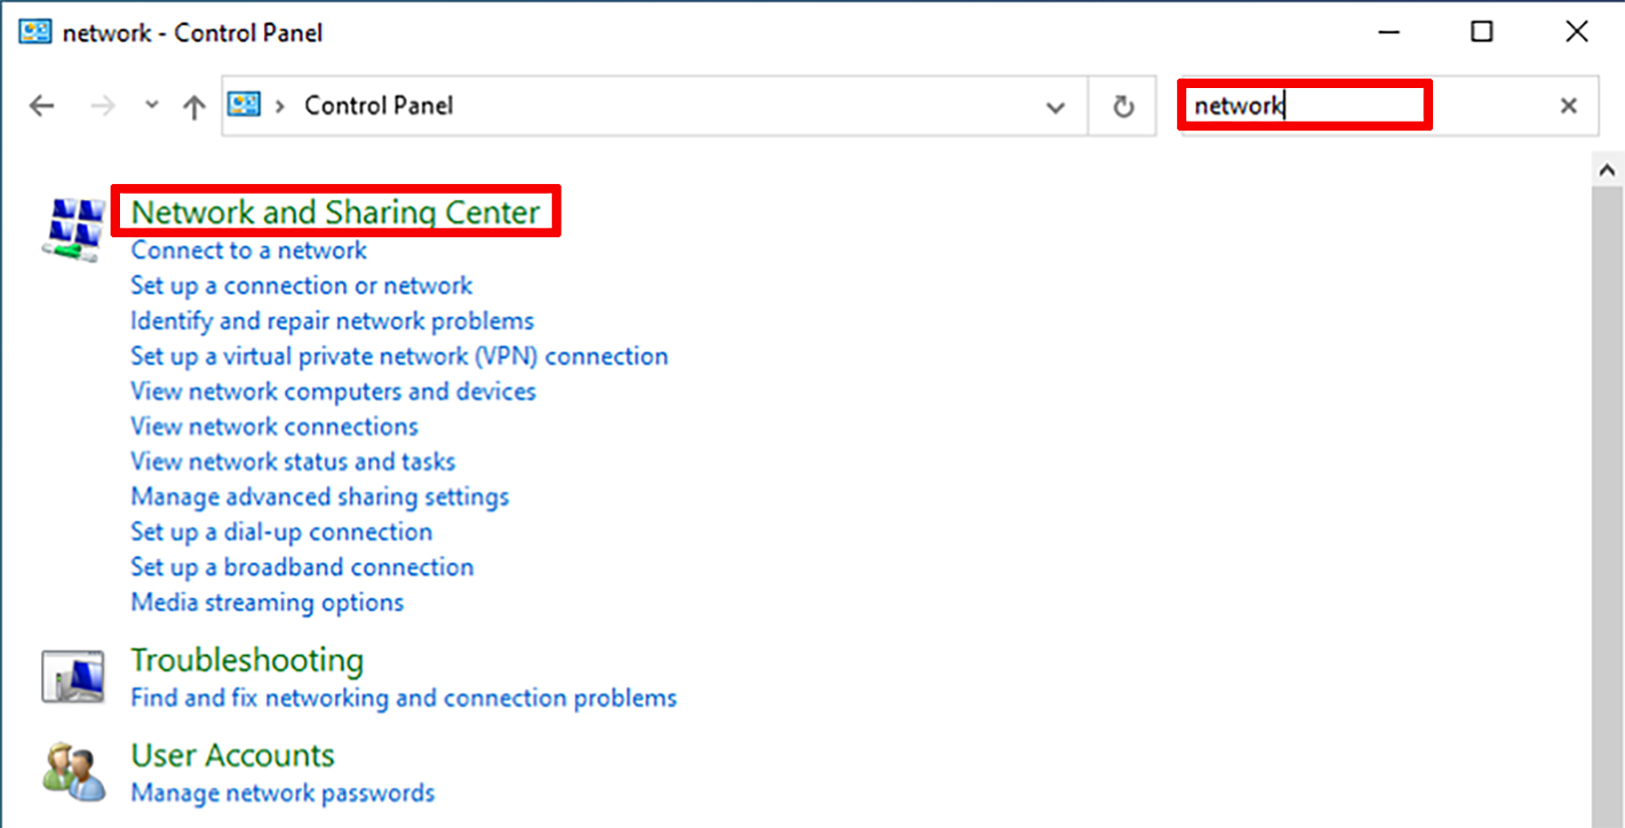
  1. Open Control Panel and search for “network

  2. Click Network and Sharing Center.

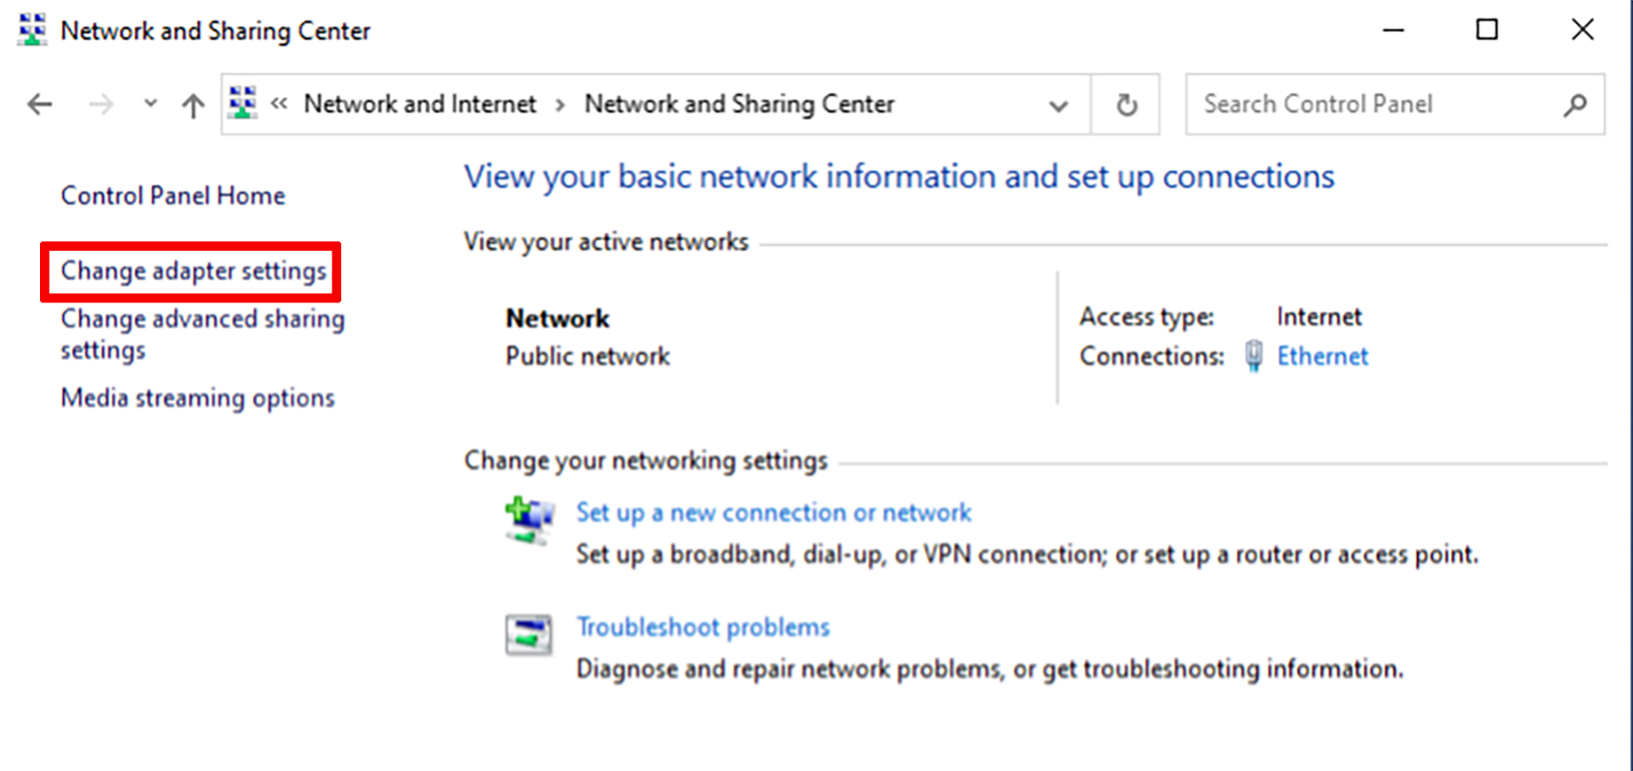
  3. Click Change adapter settings.

  4. Right-click Ethernet and select Properties.

  5. Click the Authentication tab and select the following settings:

    a.) Check the box to Enable IEEE 802.1x authentication.
    b.) Choose Microsoft Protected EAP (PEAP), as the network authentication method.
    c.) Uncheck the box for Remember my credentials.
    d.) Uncheck the box for Fallback to unauthorized network access.


    e.) Click the Settings button and enter the following settings:

    i. Check the Verify the server’s identity by validating the certificate box.
    ii. Check the AAA Certificate Services box listed in the Trusted Root Certification Authorities.
    iii. Select Secured password (EAP-MSCHAP v2) from the Select Authentication Method dropdown list.
    iv. Check the box for Enable Fast Reconnect.

v. Click the Configure button and, from the popup window, uncheck the box named Automatically use my Windows account logon name and password (and domain if any).
vi. Click OK.


f.) Click OK.

6. Plug your ethernet cable into your computer.

7. In the authentication window that pops up, enter your CP username and password.

*If the “Authentication” tab is missing from ethernet properties, do the following:

  1. Using the Windows Search Bar to find and open Services

  2. Scroll down to a service named Wired AutoConfig, right-click on it, and click Properties.

  3. In the “Startup type” drop down menu, select Automatic, click the Start button, then click OK.


Linux

 click to view how to connect in Linux...
  1. Click the Applications icon.

  2. Use the search bar to find and open the Advanced Network Configuration app.

  3. Click the + (plus) button on the bottom left corner of the new window.

  4. Select Ethernet from the drop-down menu, then click Create….

  5. Type a name for this connection, then click the 802.1X Security tab.

  6. Check the box for Use 802.1X security for this connection.

  7. Enter the following information in the new boxes:
    a.) Authentication: Protected EAP (PEAP)

    b.) Anonymous identity: leave blank

    c.) Domain: ad.calpoly.edu

    d.) Check the box for No CA certificate is required

    e.) PEAP Version: Automatic

    f.) Inner authentication: MSCHAPv2

    g.) Enter your CP username and password

  8. Click Save.

  9. To use this new connection, click on the network manager icon in the top right corner of the screen.

10.  Click Wired Connected.

11.  Click on your newly created connection.


  • No labels